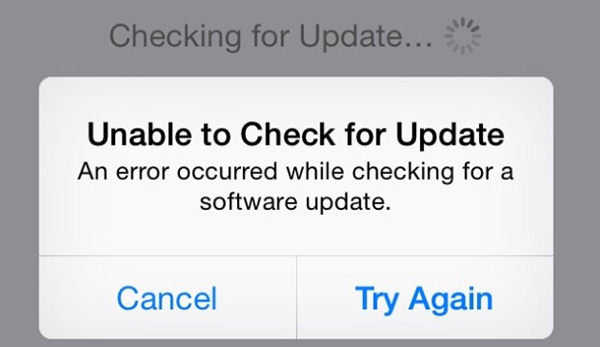
As reported from many iOS users, there is an error prompted in the process of checking for update to iOS 17. You'll be informed by "Unable to Check for Update" message, which may be caused by limited storage, bad network or server error, device compatibility, etc. However, you don't have to be nervous about this issue as lots of iPhone or iPad users have experienced it and found a practical method to fix it. To help you, here we are going to show 9 optimal solutions to efficiently repair this issue.
- Part 1: Make Enough Room for Update
- Part 2: Restart Settings App
- Part 3: Ensure Enough Power
- Part 4: Check Internet Connection Status
- Part 5: Check for Update with iTunes
- Part 6: Restart iOS Device
- Part 7: Delete iOS Beta Software
- Part 8: Check Apple Servers
- Part 9: Repair Update Error for iOS 17 without Data Loss
1. Ensure You Have 3GB or More Space on Your Phone
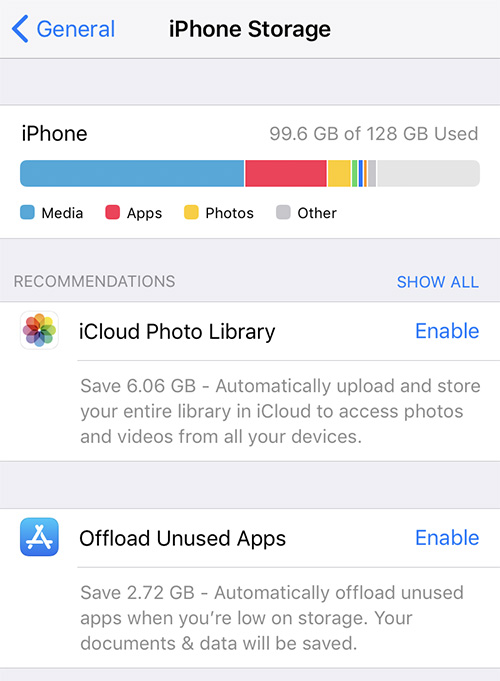
The device that goes to upgrade should have at least 2.77GB free storage space. But 3GB or more will keep you on the safe side. Delete unnecessary files and apps then try upgrading to iOS 17 from your settings app again. To check it, go to "Settings" → "General" → "iPhone Storage". Meanwhile, remember to make a backup of the phone data on iTunes and ensure your iCloud backups are up to date. If you have any error retrieving the data after the update, anikeep iPhone Data Recovery app can always help recover lost data and ensure data safety after the upgrade to iOS 17.
2. Refresh Your Device and Restart Settings App
If your iPhone or iPad get unable to check for update when upgrading to iOS 17 error message based on the condition where you have enough space, the first step is to refresh your device memory. You only need to press the power button as if you want to restart but when the apple logo appears, release the power button and click the home screen. To restart the settings app, simply exit to the home screen, swipe to close the settings app then tap the settings button to access general updates then update to iOS 17.
3. Charge Your iPhone iPad
Updating your iOS system takes up a lot of battery power and a low battery may not allow you to make a full upgrade. You have to connect your charger throughout the whole process if you have a faulty battery that may die while the system is upgrading to avoid crashing your device. A battery below 50% will definitely give you "unable to check for update" error which is easy to fix. After getting the required charge, you can go back to your settings app and click the update button again.
4. Switch to a Strong and Stable Internet Connection
Your network speed will determine the time your phone takes to download updates for iOS 17. For Over The Air (OTA) from iTunes and the settings buttons will give you an error button and sometimes to fix this iOS update error, just change to a strong network. Apple server may reject your update if you attempt to update on a public Wi-Fi or an established insecure network. You have to make sure you use the right network. Or reset network settings by heading to "Settings" → "General" → "Reset" → "Reset Network Settings".
5. Let iTunes Check for Updates to iOS 17
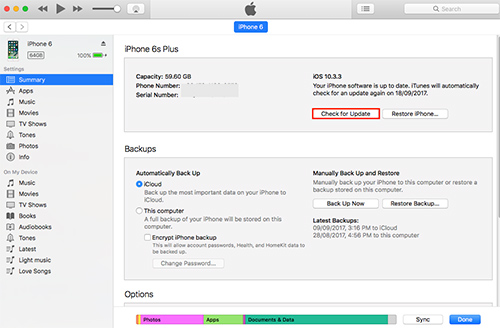
OTA upgrades are easy and fast which is why this is the best way to update your iOS system if the settings button update is not working. You need to have the latest iTunes version on your computer for this to work perfectly. Plug in your cable and connect to the device then go to "Summary" → "Check for Update" from the iTunes app. You have to ensure the upgrade is complete before disconnecting your device as the computer acts as your server during the OTA upgrade.
6. Restart Your Device
The device may be overloaded with processes or you may have too many apps running in the background preventing the device from connecting to the Apple servers. If all these methods are not working a hard reset may be necessary to reboot the memory but this has to be your last option. You simply need to press your power button until you see the Apple logo then swipe it down to switch off. You can then switch on after 5 or 10 minutes then go to your general settings and check for the iOS 17 update icon.
7. Delete iOS Beta Version
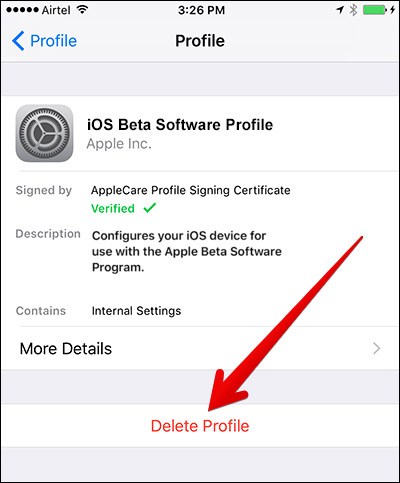
If you have installed the iOS beta installed on your iPhone or iPad, your device will be detected as having the latest system on the apple server and you will not get the link to upgrade to iOS 17. Guarantee your network settings are reset to avoid errors in updates after deleting the beta version. Go to your network settings on the settings app then click the reset network settings icon. You can then go to the general settings then select profile and device management to delete the beta version. Restart your device then check the settings, you should be able to see iOS 17 in the new system update options than proceed to upgrade.
8. Check if Apple Servers Are Running Properly
If all the network and device conditions are working properly, Apple may be the problem. Apple server failure is not rare, when new system updates are introduced, the number of devices connected to the server at a time may be too high. You need to check the Apple system status to see if everything is green. If you see a red or yellow icon, you have to wait and try your update at a different time.
9: Fix iOS Update Error with anikeep UltFix iOS System Recovery
anikeep UltFix iOS System Recovery is a powerful tool that can be compatible with all iOS versions, even the latest iOS 17.4. It's well developed to repair 150+ types of iOS/tvOS system issues on iPhone, iPad, iPod touch and Apple TV. With the help of this marvelous iOS repair tool, you can utilize a free option to handily enter or exit the recovery mode in one click. It functions well to repair iPhone unable to check for update error, iPhone won't update, iPhone stuck on verifying update and suchlike issues. Satisfying, no matter which scenario you are in, it causes no data loss.
- Get various iOS issues repaired without data loss
- Rescue kinds of iPhone update error professionally
- Support iOS 17.4 and different iOS devices
- With free access to enter/exit recovery mode easily
- Upgrade iPhone/iPad to iOS version that's even unsigned
Step 1 Run program and connect iOS device

Get the program, anikeep UltFix iOS System Recovery, downloaded and installed on your computer. Launch it to connect your iOS device. Once it's recognized successfully, click on "iOS System Repair" and then "Start" option to go next step.
Step 2 Boot iDevice to recovery or DFU mode

Choose the "Standard Repair" mode to initiate a process with no data loss. If your device cannot go through the device detection process, according to onscreen steps, you can set your iOS device to recovery mode or DFU mode manaully.
Step 3 Download and verify the firmware package
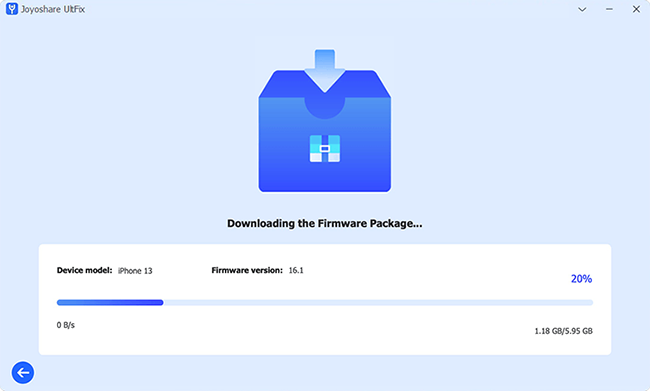
This iOS repair tool will take you to confirm all detected device info. Then you should press on the "Download" button to start to download and verify the matchable firmware package for your iOS device.
Step 4 Repair iPad/iPhone unable to check for update to iOS 17

Now click the "Start Standard Repair" option to confirm your operation and this program will unzip the downloaded firmware package to fix iPad or iPhone software update error on iOS 17. Wait patiently for its completion.
Conclusion:
Upgrading your device to the latest system version is necessary if you intend to get the best service from your iOS device. If your iPhone, iPad or iPad touch is unable to check for update when upgrading to iOS 17, these steps will help you access your update. However, every system update comes with a data loss risk and you have to brace for one by ensuring your iCloud and iTunes backups have all the data you need on your device. To ensure data security, try anikeep UltFix, which is powerful to both repair your iOS system issues and upgrades iOS version.