Q: "What app/website can I use to merge two recordings together?" - From Quora
When working on a video project such as creating a training video, you will often need to use multiple screen recordings and other video or audio content to complete your work perfectly. So how to combine screen recordings to a larger file without sparing efforts? You may need an all-powerful video joiner or let's say, a screen recorder that features such kind of function. In this A to Z guide, we are going to take you through several ways of merging screen recordings using up to 4 versatile tools, including 2 video joiners and 2 screen recorders.
Part 1. How to Combine Screen Recordings Using a Video Joiner
Using a video joiner is undoubtedly the best way to merge and combine recorded videos and audios. A professional video merging program will enable you to merge screen recordings in different formats easily without any limitations. Among so many options in the market, here come the top two.
VideoKit
VideoKit has an intuitive and immersive design, which enables you to join two or more recordings instantly. Supporting a wide range of formats, such as MP4, MOV, MKV, OGG, AVI, MP3, FLV, FLAC, AAC, AIFF, WMA, WMV, etc. it will allow you to combine all video and audio recordings without any hassle. Most importantly, all the merging work can be done without losing any quality at 60X amazing speed.
Using this handy and smart video joiner, you can also customize your screen recordings before merging them. To give an example, you are able to view your video recordings in the preview window and then utilize the slider below to cut out some unwanted content accurately. Additionally, you are free to edit videos by cropping, rotating, adjusting the aspect ratio, adding wantermark, and more.
- Offer a unique user interface and many editing features
- Combine video and audio recordings without losing quality
- Customize recordings before merging at 60X fastest speed
- Join as many videos and audios of various formats as you want
- Rearrange the order of screen recordings to be merged in batch
-
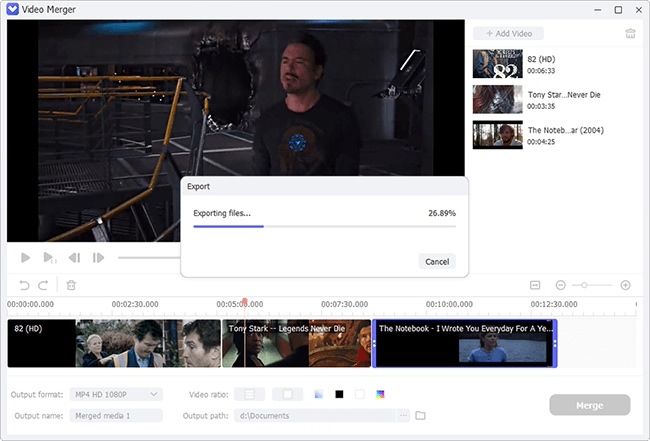
Step 1: Run VideoKit and Open Video Joiner
Having downloaded and installed VideoKit, you are able to find the "Video Joiner" under the "Convert" section. Click to open it. Next, press the "Open File" button in the bottom left of the screen or directly drag several files at a time to the left panel to add your screen recordings. You can drag them to change the order and preview them in real-time.

-
Step 2: Tweak Merging Mode and Output Format
The "Format" button can be easily spotted in the bottom right corner of the screen. Tap it to set up your merging mode and your wanted output format. The high-speed mode is high suggested as it can help you combine recordings losslessly. But if you would like to adjust the codec, resolution, bitrate etc. and do some other simple editings, then you need to select the encoding mode to help you save all the changes you are to make.

-
Step 3: Cut Screen Recordings
After selecting your joining mode and your target format, you can click "OK" to go back to the main screen. To cut out some useless parts of your screen recordings, you are supposed to drag the blue slider shown under the preview window and the video content inside the slider will be saved well.

-
Step 4: Edit Videos Optionally
Under the encoding mode, you are also able to tap the "Edit" icon located at the rear of each title of screen recordings to start to personalize your recordings. Features such as adjusting aspect ratio, changing brightness, inserting text and image watermarks, adding subtitles and special effects, etc. are available.

Note: If you would like to sync your audio recordings such as an additional voice over or a specific piece of background music with your video recordings, you can choose the "Audio" option in the editing window and then press the "..." button near the "File" to browse and add your audio recording file. Tick the "Repeat" to loop playback if necessary.

-
Step 5: Combine Two or More Video Recordings
Finally, click the "Convert" button in the bottom right corner of the main screen to start to join several screen recordings into a larger file. The local folder where the merged file is saved will be opened automatically after the process is finished.
Bandicut
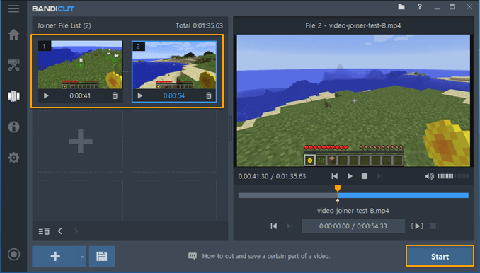
Another reliable screen recording joiner is Bandicut. It is capable of quickly merging and combining multiple screen recordings into one file with a user-friendly interface. As a professional video joiner, it supports different popular formats, including AVI, MP4, MKV, OGG, etc. You can not only use it to combine two recordings while preserving high quality, but also be able to remove unnecessary content. But this software only works on Windows operating system.
Guide:
Step 1: Start Bandicut on your Windows computer and click the "Join" button on the main interface;
Step 2: Press the "+" button to add your recorded videos; you can change the video sequence as you like;
Step 3: Tap the "Start" button in the bottom right of the screen to open a new window for more settings;
Step 4: Now you are able to select either the high-speed mode or the encoding mode, change the output file format, adjust the final file name, remove audio tracks, etc.;
Step 5: Press the "Start" button again to initiate the screen recording merging process.
Part 2. How to Combine Recordings Using a Screen Recorder
It is possible for you to combine screen recordings straightforwardly right after finishing the recording process when using a professional screen recorder. Here we are going to introduce you two screen recording tools that will help and show you how to use them in a few simple steps.
Camtasia
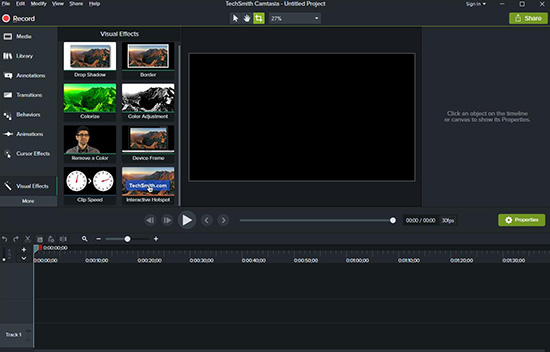
Camtasia can serve as both a screen recorder and a video joiner. What makes this software so special is that it has an incredible timeline that enables you to edit screen and sound recordings directly and freely. At that time, you will also be able to add recorded sound to video recordings easily. In addition to this, Camtasia will allow you to save your merged file in MP4, WMV, AVI, GIF, or M4A (audio only). You can also share your cimbined screen recordings to Vimeo, YouTube, Google Drive, etc.
Guide:
Step 1: If you use Camtasia to record screen, the recorded videos and audios will be displayed in the "Media Bin" and they're ready to be used in your Camtasia project;
Step 2: Drag the recordings to the timeline in the order you want them to appear;
Step 3: You can press the S key or click the "Split" button to trim and cut your screen recordings if you like;
Step 4: Now tap the green "Share" button to export your video in the way you prefer.
Note: You are also able to navigate to File > Import > Media or tap the "+" button under the "Media" section to select "Import Media" to add your other screen recording videos to your Camtasia project for video and audio merging.
RecMaster
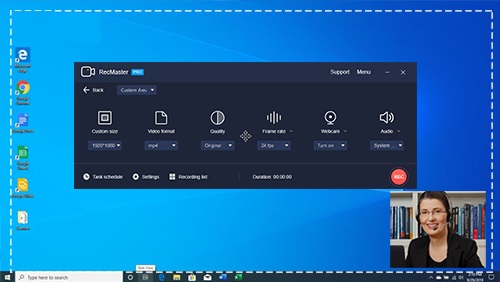
RecMaster is a high-pwerformance screen recording software. You can take advantage of its up to five recording modes to record and save anything that happens on your computer screen. Using RecMaster, you can merge screen recordings in the file list in a fast and easy manner. The steps are as follows.
Guide:
Step 1: After running RecMaster on your computer, choose a recording mode at first;
Step 2: Click the File list having entering into the setting overlay to select one of your screen recording video;
Step 3: Hit on the little scissor-like icon at the bottom of the screen to edit your selected screen recording;
Step 4: Press the "+" button to add more screen recordings;
Step 5: Now you are able to tap the "Export" button to combine and save the outcome sucessfully.