Q: "I have some .mov video clips and want to add subtitles to them. How to do it?" - From MacRumors Forum
There are many reasons why you need to add subtitles to MOV. To give an example, when making a how-to video in MOV format, inserting subtitles is a simple way to make video content more accessible to your audience. If you are watching a MOV movie, adding and showing subtitles or captions will enable you to understand the story better. Moreover, some platforms such as Instagram fail to accept subtitles, which means you have to add a subtitle file to a MOV file in advance using a third-party video joiner. Therefore, to overcome such issues, here we are going to show you how to add subtitles to a MOV file using VideoKit and VLC respectively.

Part 1. How to Add Subtitle to MOV File - VideoKit
VideoKit is released as a brand-new product integrated with video joiner, video cutter, screen recorder, etc. When using its built-in video merger, you will be able to combine literally all videos and audios without causing any quality loss at 60X blazing-fast speed. Coming with two smart merging modes, it supports a number of devices, HD videos, adjustable parameters like codec, bitrate, frame rate, etc.
Featuring a powerful video editor, VideoKit can not only add subtitles to MP4, MOV, WMV, FLV, MKV, AVI, etc. but also touch up loaded videos and audios in the easiest manner from different perspectives. For instance, you are free to trim and cut files, insert your own logo, apply special effects, etc. Moreover, after importing your subtitles, you will be able to customize its font style, font color, shadow offset, outline size, and more.

- Add (IDX, ASS, SRT, SSA, SMI, etc.) subtitles to videos
- Personalize various forms of subtitles in the way you like
- Join MOV videos losslessly at 60X super-fast speed
- Designed with handy high-speed mode and encoding mode
- Support different video and audio formats on Windows and Mac
-
Step 1 Import MOV Files to VideoKit
Run VideoKit on your Windows or Mac computer. Click on the "Convert" Tab and open the video joiner. After that, you can drag and drop several MOV files at a time or press the "Open File" button
 instead to import your MOV videos to the program.
-
Step 2 Confirm Format Settings
The "Format" button can be easily spotted below the preview window. You can tap it to set up your output format as well as your merging mode. Here the encoding mode is highly suggested, which will enable you to save all the adjustments you are about to make. Next, click on the "General Video" tab and choose your output format. You can tick the little gear icon nearby to customize the video codec, resolution, bitrate, etc.

-
Step 3 Freely Cut out Unwanted Video Content
You may have noticed that there is a blue slider as well below the preview window. Drag it from the front or back as you like and the video content outside the slider will be removed after merging subtitles with MOV videos.

-
Step 4 Add Subtitle to MOV File
Having chosen the encoding mode, now you are able to opening the "Subtitle" tab by clicking the "Edit" icon
 at the rear of each MOV video. You will need to tap the "..." button to browse and add your downloaded subtitle. To stylize your subtitle, you can also click on the "T" button to change font color, font style, vertical spacing, etc.
-
Step 5 Export MOV File with Subtitles
Tap the "OK" button to go back to the main interface. If you have loaded more than one MOV videos and have inserted subtitles respectively, you are also able to reorder them by simple dragging. Now you can click on the "Convert" button below the preview window to export MOV videos with embeded subtitles immediately. Please check the following video if you have any questions about the aforementioned steps.
Part 2. How to Add a Subtitle File to a MOV File - VLC
We have mentioned so many times that VLC, as one of the best open-source media players, can not only play movies and music on Windows, Mac, Android, Linux, etc. but also convert between videos and audios, merge files, record screen, trim MP3, etc. Now in order to make the most of this versatile tool, we will also show you how to add subtitles in VLC so that you can merge your MOV videos with subtitles without downloading any other third-party programs.
Step 1: After running VLC, navigate to Media > Open File to open your MOV video with this media player;
Step 2: Next, click on the "Subtitle" tab from the menu bar and select "Add Subtite File" to import your subtitle file;
Step 3: Now you can play your MOV video with a subtitle; if the subtitle file is not in sync with your MOV video, you can use both the G and H keys on the keyboard to change the playback delay;
Step 4: Finally, go to Media > Convert/Save to specify your output format and then export your MOV video inserted with subtitle eeasily.
Note: If you use Media > Open Multiple Files to open your MOV videos, you will need to tick the "Use a subtitle file" checkbox and then click on the "Browse" button to import your subtitle file.
Tips. Show Subtitles in QuickTime Player on Mac
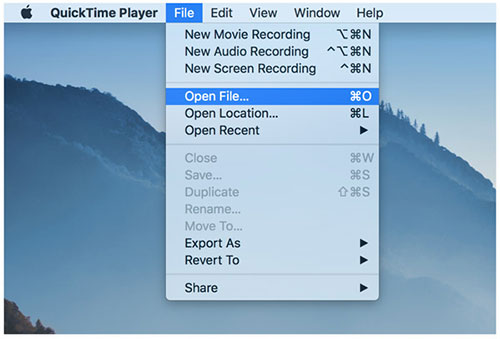
As QuickTime is bundled with macOS and at the same time, .mov is a common filename extension of a QuickTime movie, here we are going to teach you how to show subtitles or captions in QuickTime Player easily. But it is worth mentioning that QuickTime Player can only display subtitles or captions when your MOV movie has ones.

Step 1: Open your MOV movie that has subtitles or captions in the QuickTime Player on your Mac computer;
Step 2: To view subtitles, you need to select View > Subtitles and then choose a language, and in the playback controls, you are also able to tick the "Subtitles" button to see many available options;
Step 3: To view closed captions, you will need to choose View > Show Closed Captioning.
Conclusion
The steps on how to add subtitles to a MOV file in 2 ways has been mentioned above clearly. If you have downloaded VLC previously, it would be much more convenient for you to use it to add subtitles to MOV files. But if you have not, maybe you could consider using VideoKit, which has more flexible editing features. After all, this video toolkit also has a free media player.